How to use the Persuasive Notifications Workspace
https://docs.convertize.io/fr/docs/comment-utiliser-le-workspace-de-notifications-persuasives/Convertize allows you to add and test persuasive notifications to your website that are based on psychological principals such as Social Proof, FOMO, Urgency and Scarcity.
You can add notifications with the Persuasive Notifications SmartPlugin™. You can find it in the menu with SmartPlugins on the middle left of the Smart Editor.
Drag and drop the Persuasive Notifications SmartPlugin™
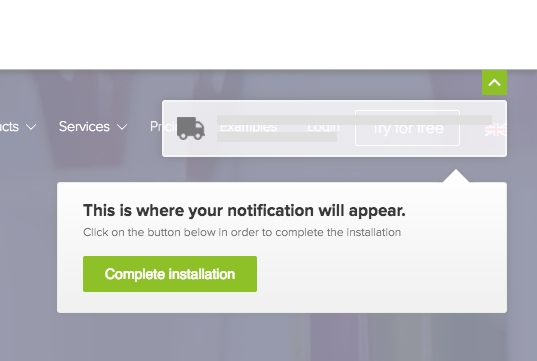
To start adding notifications, simply drag and drop the SmartPlugin™ anywhere on the page. Once you have dropped the plugin, select ‘Complete Installation’ as shown below to arrive at the Persuasive Notifications Workspace.
Choose a Notification
In the Persuasive Notifications Workspace, you see a list of notifications. You can either choose a recommended notification or create one yourself.
At the top, you see ‘Recommended Notifications’. These are the notifications we recommend for the Industry and Page Type you selected when defining your experiment. The recommended notifications are based on psychological principles. On our website, you can find more information on the principles behind our notifications and tactics. The two in the image below are indicated as being based on Scarcity and Urgency.
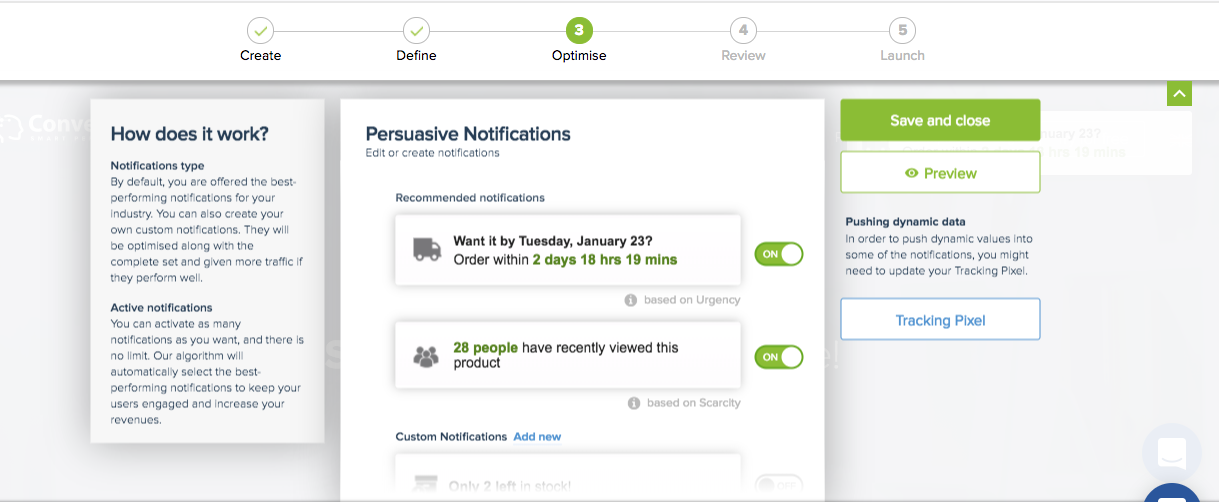
As you can see, to the right of each notification is a toggle that you can turn green or grey to activate or disable each notification.
Create a Custom Notification
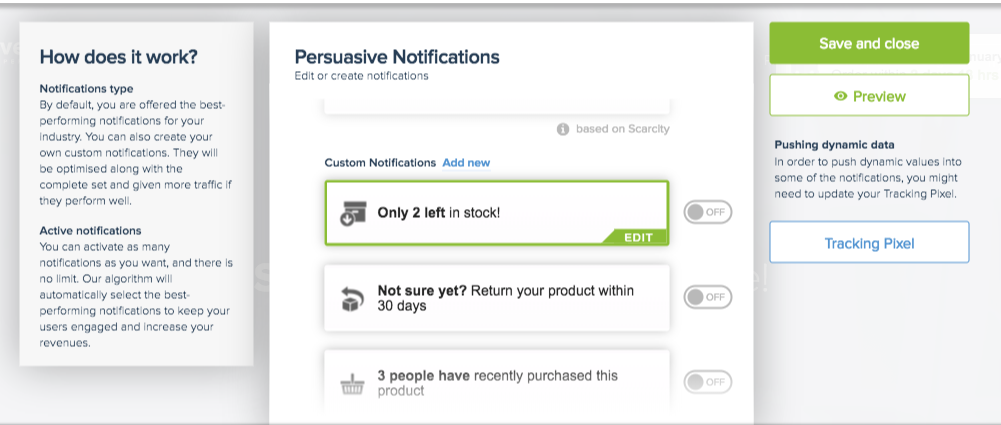
You can also create your own notification. At the bottom of the list you will see the ‘Add New’ button, which allows you to create a completely customised notification of your own. To edit existing notifications, move your cursor over one and select the green ‘Edit’ option that becomes visible (as seen below).
Customise your Notifications
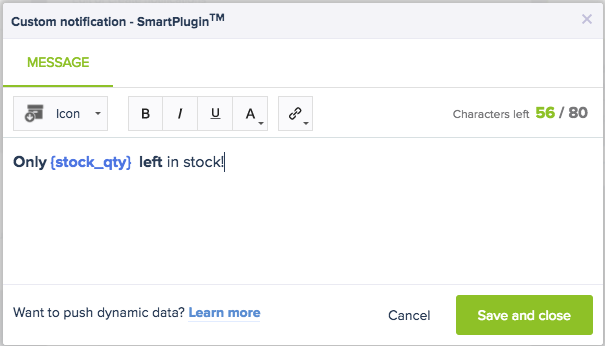
The notification editor shown in the image below has the following options for customisation:
- Icon: allowing you to select an icon to display.
- Bold/Italics/Underline/Change colour: these all work like a conventional text editor, and you can use a HTML colour code to add a custom text colour.
- Insert link/Remove link
You can also add dynamic values to the plugins, as indicated by the {stock_qty} value below. Please see our dedicated documentation page on this.
Once you have finished customising your notification, click ‘Save and close’ to see a preview of how it will look in the Workspace.
Preview Notifications on your website
If you want to see how the notifications will appear on the page you are editing, select the ‘Preview’ option as shown below and a new window will open showing this.
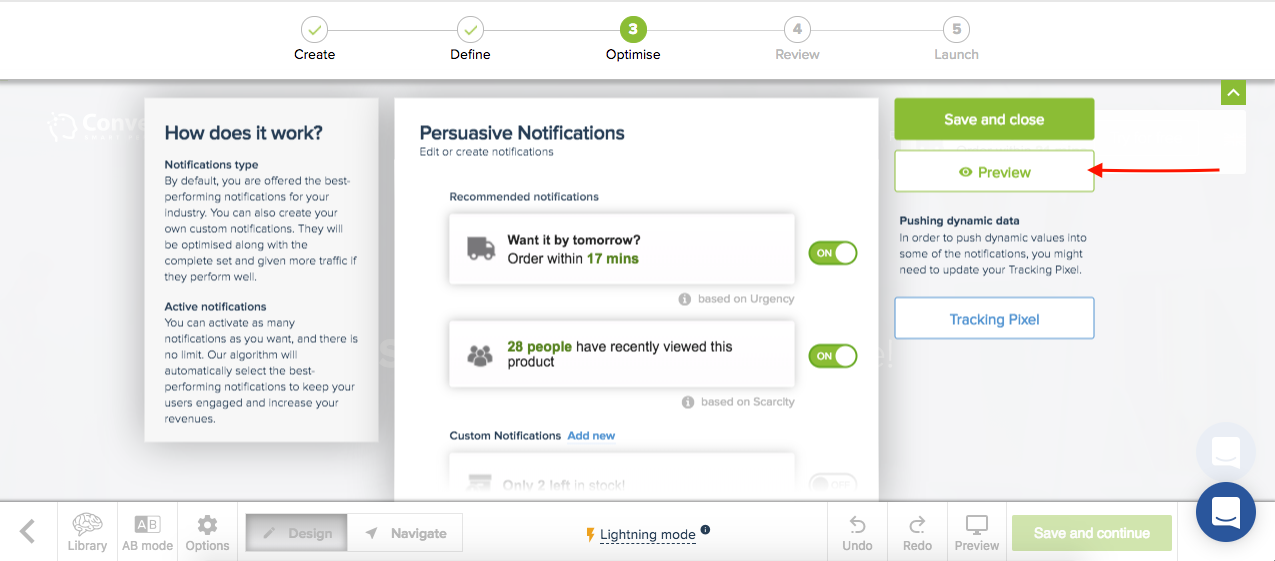
Alternatively, select ‘Save and close’ to return to the SmartEditor. To return to the Workspace, click on the notification and select ‘Edit’ from the menu.
How do I make the notification style match my page?
If you want to alter the style of all of the notifications at once, select ‘Options’ in the bottom left of the Smart Editor and navigate to the ‘Notifications’ tab.
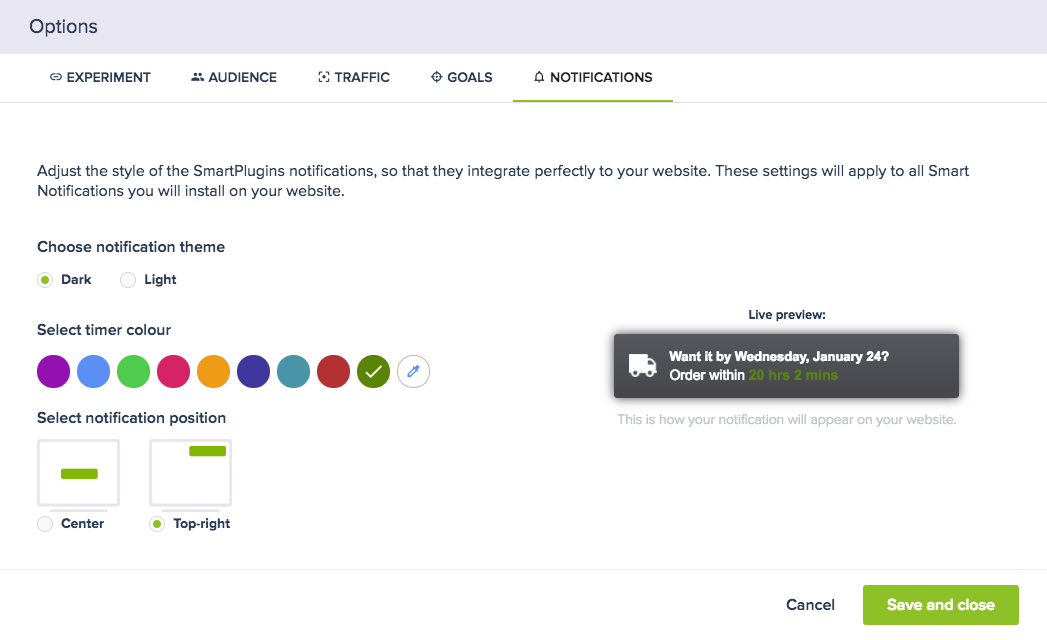
Here you can alter the theme, timer colour, and the position you want the notifications to appear. Please ensure you click ‘Save and close’ to ensure any changes you make are applied.
Follow the links to see how the Scarcity and Urgency notifications are programmed to appear.